Apple Streusel Muffins

It’s funny the way the mind works. This morning before breakfast I thought about the nice bag of MacIntosh apples that we’d bought a day or so ago, then remembered that we still had two Granny Smith apples in the fridge from even earlier, at which point my brain just interrupted itself to yell “Apple Streusel Muffins!” So, not wanting to cause any internal conflicts so early in the day by struggling with that thought, I found a recipe online and dashed to the kitchen.

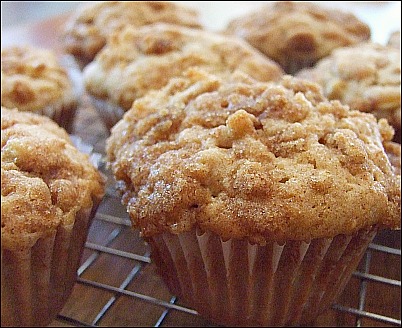
I made some adjustments to the original recipe which I think worked out well – here’s the final Apple Streusel Muffins recipe (below) that I worked from. Came out looking and tasting delicious, if I do say so myself. Of course, the other samplers I had on hand also seemed to like them, so there’s more than just my opinion, if you were worried – LOL.

apple streusel muffins

Apple Streusel Muffins

2 cups flour
2 teaspoons cinnamon
1/4 teaspoon nutmeg
1 teaspoon baking powder
1/2 teaspoon baking soda
1/2 teaspoon salt
1/2 cup butter, softened
1/2 cup white sugar
1/2 cup brown sugar
2 eggs
1 1/4 teaspoons vanilla extract
1 1/2 cups chopped apples
1 1/2 cups shredded apples

Topping:
1/3 cup brown sugar
1 tablespoon flour
1/8 teaspoon cinnamon
1 tablespoon butter, softened

In mixing bowl, mix flour, cinnamon, nutmeg, baking powder, baking soda, and salt, and set aside.

In large mixing bowl mix butter and sugars until creamy. Add eggs and mix. Mix in shredded and chopped apples and vanilla. Gradually stir in flour mixture until well mixed. Batter will be thick.

To mix topping, combine brown sugar, flour, cinnamon, and butter in a small bowl and mix with a fork to get smallish crumbly chunks.

Grease regular-sized muffin tins (or use paper liners) and fill each space with muffin batter. Then, sprinkle about a half teaspoon of streusel topping on each muffin.

Bake at 375F for 20 minutes or until a toothpick inserted into the muffin comes out clean. Makes about 16 muffins.

Adjustments on Half-Moon Cookie Recipe

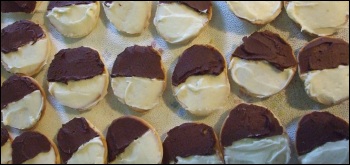
In the New York City area they are called Black & Whites and have chocolate and vanilla icing on them, but in upstate New York, where I am from, they are called Half Moon Cookies and have more of a traditional frosting than a hard icing.

Anyway, I’ve adjusted the recipe we have on our site, which originally came from the New York CookBook. Basically, the changes are… instead of 2.5 cups of cake flour and 2.5 cups of all purpose flour, I found that 4 cups of cake flour and 1 cup of all purpose flour make for a much lighter cookie, but still with excellent consistency. They were just too dense and heavy before with so much of the regular flour.

Also, instead of the 20-30 minutes of cooking time, I suggest 12-15 minutes MAX. I don’t even know where they got 20-30 minutes – if I left them in that long at the suggested temperature they’d be dark and crispy, and not in a good way. 12 minutes at 375 in our oven works just fine.

Here’s the recipe:

Half Moon Cookies

1 3/4 cups granulated sugar
1 cup (2 sticks) unsalted butter, softened
4 large eggs
1 cup milk
1/2 teaspoon vanilla extract
1/4 teaspoon lemon extract
4 cups cake flour
1 cup all purpose flour
1 teaspoon baking powder
1/2 teaspoon salt

Preheat oven to 375. Butter two baking sheets and set aside.

In a large mixing bowl, combine the sugar and butter and mix by machine or hand until fluffy. Add the eggs, milk, and vanilla and lemon extracts and mix until smooth.

In a medium bowl, combine the flours, baking powder and salt and stir until mixed. Add the dry ingredients to the wet in batches, stirring well to combine. Using a soup spoon, drop spoonfuls of the dough 2 inches apart on the prepared baking sheets. Bake until the edges begin to brown, 12 to 15 minutes. Allow to cool completely.

Note: Frost flat side of cookie, half in chocolate, half in vanilla – can use your favorite frosting recipes, although some prefer more of a glaze or icing than a frosting.

Oh, and that photo of the Half Moon Cookies up there is an older photo. I did make a successful batch a day ago, but just as I was mixing all the dry ingredients we lost power for a few hours. It was after 8 p.m. when we got power back, and by the time the cookies were mixed and baked and ready for frosting I was really tired so I only did chocolate frosting on them – LOL – making them, effectively, just new moon cookies, I suppose. So that’s why I didn’t take new photos – but they came out just perfect with the recipe adjustments – deliciousness!

Chocolate Ganache – Easier Than I Thought

A while ago, I had an impulse to try making chocolate ganache. For a long time I’d thought ganache to be this tremendously tricky thing (probably because the word ‘ganache’ SOUNDS complicated, although apparently it comes from the French word ‘jowl’, which makes sense, but suddenly makes it seem NOT so exotic anymore – heh), but when I found a recipe, I was pleasantly surprised and thought, “Hey, even *I* could make this!”

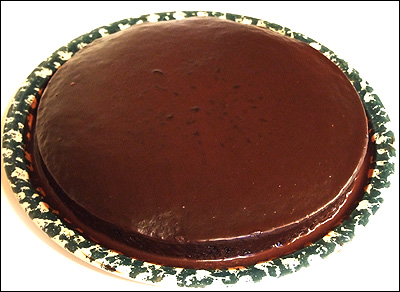
I used the chocolate ganache recipe from allrecipes.com (minus the rum – that just leaves heavy cream and chocolate chips), and poured the finished product over a single layer of a chocolate mayonnaise cake that I had made earlier just for this experiment.

It is recommended pouring the ganache on top of the cake when the cake’s on a baking rack so it doesn’t pool and the sides look smooth, but I did it right on the plate because I didn’t feel like messing with the rack, but in the future, I’d recommend the rack method. (You can see a bit of the pooling in the image above.)

Anyway, it came out nicely, I think. Next time, however, I’m going to add a touch more chocolate than is recommended and wait a tad longer for the ganache to cool, as it was a little thin when I poured it on the cake.

Also, if you whip the ganache in a mixer for about 5 minutes I hear you’ll get fantastic frosting, although I haven’t tried this myself yet.

[Tags: , , , , ]

Vanilla Ice Cream with Fudgy Bits

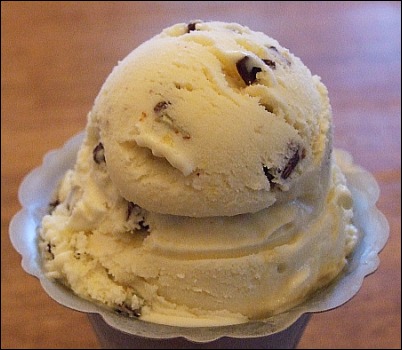
What do you do with those few pieces of leftover chocolate walnut fudge? (Leftover fudge? Such a thing exists?) You chop it up and add it to a new batch of homemade vanilla ice cream, of course!

It was very tasty, although the coldness did take away some of the intense flavor of the fudge. Still, the textures went very well together. I’ll consider it a successful experiment.
[Tags: , , , , ]

Converting Food Follies to WordPress

We’re going to be converting Food Follies to a WordPress site, so there may be a little dust as we go through the process. When we finish, the RSS feed will have a different link (so if you’re reading this via RSS, this may be the last post you see until you grab the new RSS link we’ll make), and all of the recipes will (hopefully) be integrated in with the posts, all in their separate categories. Wish us luck!

Homemade Chocolate Ice Cream

John did a wonderful and horrible thing over the holidays – he gave me an ice cream maker! *grin*

The ice cream maker is a Donvier (made in Canada), and has a metal cylinder you freeze in the freezer (no rock salt required) and has a manual handle to churn the ice cream, which is very satisfying, and easy to do while watching tv or reading food blogs.
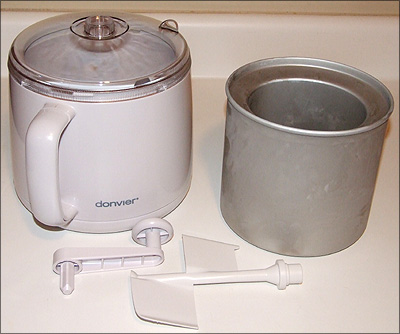
Since we’ve acquired this magical piece of kitchen equipment, we’ve been doing a lot of experimentation, and I’m finally getting around to posting about it – sorry it took so long – ice cream coma!

We’ve learned that we definitely prefer the ice cream that’s made with the cooked custard-like base with eggs, as opposed to the non-egg recipe that’s also not cooked. The custard-base ice cream turns out SO smooth and creamy, and while the non-cooked, non-egg one is also very good, it’s a little more ‘ice crystally’ and not as smooth and creamy – your mileage may vary.

The first cooked ice cream that we made was based on a basic ice cream recipe we found on the internet and adjusted to our own taste – see below.

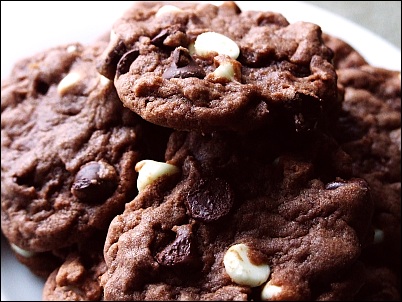
For this batch, though, we went overboard, and instead of JUST adding cocoa, we also added 3 ounces of finely chopped dark chocolate, which melted into the custard base before it cooled. The ice cream was ALMOST (I said ALMOST), if there is such a thing, TOO chocolatey, but was magnificent and decadent!
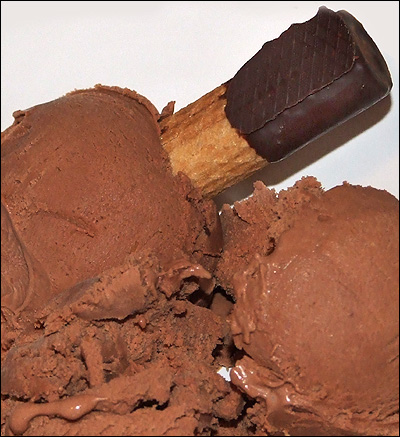
Needless to say, it didn’t last very long.

Stay tuned for more ice cream experimentation results, including frozen yogurt, and what to do with leftover fudge (wild guess?).

Homemade Ice Cream

Basic recipe is for vanilla, with chocolate additions added optionally.

3/4 cup sugar
1 cup milk
1/4 tsp. salt
3 egg yolks, lightly beaten
2 cups heavy cream
1 tsp. vanilla extract
ice cream maker

If making chocolate, also
1/3 cup cocoa

Place egg yolks in a small bowl and set aside.

Combine sugar, milk, and salt (and 1/3 cup cocoa if making chocolate) in a saucepan over low to medium heat, stirring constantly. Bring to a simmer.

Pour 1/3 of this mixture into the egg bowl and stir, then pour the egg mixture back into the saucepan. Heat until thickened, but do not boil, and stir constantly. When done, mixture will cover the spoon/spatula thickly (instead of being too liquidy and not sticking to the spoon at all.)

Remove from the heat. (To make extra decadent chocolate, you can add 2 ounces of chopped semisweet chocolate chips at this point – stir until melted.) Pour into a bowl and refrigerate for about two hours until completely cold, stirring occasionally.

After it is completely cooled, stir in the 2 cups heavy cream and the vanilla until nicely blended. Then pour into your ice cream maker and freeze according to directions.
Cookie Gun Baking Apron

Since we just got new, high quality aprons in our shop (31″ long, in three colors now too – white, khaki, and yellow), and today is the first day of December, it seemed appropriate to showcase one of our original aprons, for the holidays!

“Warning – I have a cookie gun and I’m not afraid to use it!

(Click the apron picture to buy one for your favorite cookie maker.)

I mainly use my cookie gun for the classic butter cookie recipe (offsite link – apparently I never got our family butter cookie recipe online here, but it’s pretty common) and when I want color and flavor, I use our jello cookie recipe.

You can also check out our entire selection of funny aprons and food-themed aprons just by clicking here. Happy December! Now get baking! 😉

[Tags: , , , , ]