Grilled Turkey Reuben

Every so often I remember that I love Grilled Turkey Reubens and that I haven’t had one in a LONG time!

They’re really easy to make – sliced deli turkey, lots of good saurkraut (we used Hebrew National), and a Thousand Islands dressing on your choice of rye bread – we chose a Jewish Rye. (In our area of California, the only kind of ryes available are pre-packaged, made by Orowheat, but they work just fine! Marble Rye is also good, or even a Pumpernickel, although the taste is stronger.)

So assemble the sandwich as you like, butter the outsides of the bread, and then grill until golden brown!

That’s not the most exciting picture, and you can see that it’s browned a bit unevenly, but I was in more of a hurry to EAT the sandwich than to spend time on a pretty presentation – hah! It tasted even better than it looks here, if that helps.

Here’s the official recipe:

Grilled Turkey Reubens

1 loaf marble rye bread
sliced deli turkey
1 can/jar saurkraut
Thousand Island dressing
Swiss or Monterey jack cheese
butter/margarine

Take a piece of bread, layer turkey, some saurkraut, slices of cheese, and top with dressing. Complete with another slice of bread. Spread butter on outside of each bread slice and grill sandwich in a (nonstick recommended) frying pan on low heat until bread is golden brown and crispy and cheese is melted. Cut in half and serve.

Blueberry Pie

When I saw the 2.5 lb container of fresh blueberries for 5.99 I looked at it sort of lovingly and thought, “I could make a blueberry pie.” I’ve never actually made a homemade pie. Kristen usually is in charge of pies, while I’m normally in charge of grilling and making omelettes. When I worked as a cook, our pies were made with canned fillings, so there was no help there.

I did go the easy route and went with the pre-made pie crust. I’ve actually made my own pie crust before, for Shepherd’s Pie, but since I was starting this pie in the evening, I wanted to move things along.

Billions and Billions of Blueberries

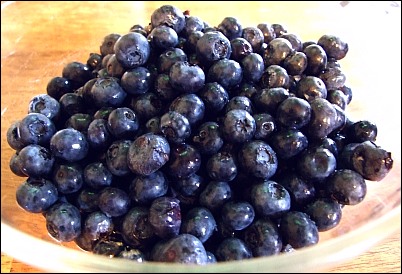
It took all of thirty seconds for us to find some basic blueberry pie recipes on the web and tweak our own variation. Putting the ingredients together was a snap, and we have enough blueberries leftover for sprinkling on breakfast cereals, mixing in yogurts and possibly sharing with the local wildlife.

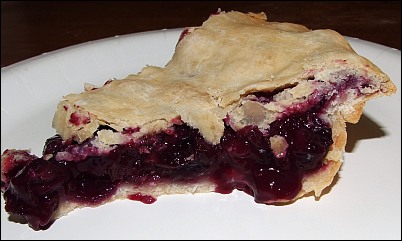
Kristen guided me through the proper method of sealing the two pie crust halves. When I made my Shepherd’s Pie, the edge was a bit on the crusty side. The baking took longer than we expected, about an extra half hour, but the results were delicious. This is the first homemade blueberry pie I’ve ever had and it beat every store or restaurant pie I’ve had hands down.

Mmmm pie

Hopefully, we can catch the other berry families on sale and live on pie for the rest of the summer. Oh, and here’s the recipe we used:

Blueberry Pie Recipe

Filling ingredients:
6 cups of blueberries, cleaned and stems removed
2 Tbsp lemon juice, freshly squeezed if possible
1/4 cup all-purpose flour
1/2 cup sugar
1/4 teaspoon ground cinnamon
1/4 tsp salt
2 Tbsp butter, cut into small pieces

Prepare crust. If you have already made dough, on a lightly floured work surface, roll out half of the dough to 1/8-inch-thick circle, about 13 inches in diameter. Drape dough over a 9-inch pie pan and put into the refrigerator to chill for about 30 minutes. If you have purchased pre-rolled circles, allow them to defrost (if frozen) and place one of the circles in the pie pan.

Put blueberries in a large blow. Sprinkle flour over the blueberries and stir until the blueberries are all coated with the flour. Then, add the cinnamon, sugar, salt, and lemon juice, to the blueberries and mix until blended. Place in the chilled bottom crust of the pie pan. Dot the top with butter pieces. Roll out the remaining dough to the same size and thickness. Place the other piece of dough on top, trim to 1/2 inch over the edge of the pan, and crimp the edges with a fork or your fingers. Put the pie in the refrigerator to chill until firm, about 30 minutes. Pre-heat oven to 425°F in the meantime.

Remove from refrigerator. Score the pie on the top with 4 cuts (so steam can escape while cooking) – add a baking ring or put foil around edges of pie to protect edges. Bake for 20 minutes at 425°. Remove pie ring/foil. Reduce heat to 350°F and bake for 30 to 40 minutes more or until juices are bubbling. Let cool before serving.

Makes 8 servings.

Jello Cut Out Cookies

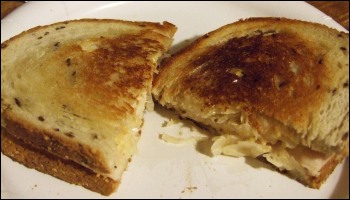
This is another one of those food photos that I took a while ago and haven’t blogged until now, as you might be able to tell, since these are CHRISTMAS cookies – hah!

Anyway… my mom never made normal sugar cookies, we always made Jello Cookie cutouts instead, which always had great flavor AND color. (You can make these cookies with a cookie press instead of cutouts if you want too.)

And these are the (raspberry flavored) Jello cookies we had over the holidays:

Below is the Jello Cookies recipe so you can play along at home! Oh, and I used a little extra jello powder instead of colored sugar on top of the cookies to give them a bit of darker accent color.

Jello Cookies

3 1/2 cups all purpose flour
1 tsp. baking powder
1 1/2 cups oleo or butter
1 cup sugar
1 pkg. (3 oz.) jello (any flavor)
1 egg
1 tsp. vanilla

Mix flour with baking powder and set aside. Cream oleo, gradually add sugar and jello, beating well. Beat in egg and vanilla. Gradually add flour mixture, mixing well. Force dough through cookie press (or make cut outs) onto ungreased baking sheets. Sprinkle with additional jello or colored sugars, decorate if desired. Makes about 10 doz (from press only). Bake at 400 degrees about 8 minutes or until sides are golden brown.

Note: This makes an excellent alternative for regular sugar cookies, both in color and flavor. Use orange jello mix for Halloween cookies, etc.

Macaroni and Cheese

Just for variety, I made macaroni and cheese in a different way than usual, by making a creamy cheese sauce first.

Used half pound of elbow macaroni and doubled the cheese sauce recipe below, pouring it over the cooked macaroni, in a large casserole dish. Mix in about 1/2 to 1 cup of grated parmesan cheese for extra kick, then bake for a half hour on 350.

Next time I’ll use ALL extra sharp cheese, no Monterey Jack, as the extra amount of milk really made it a bit milder than it needed to be.

Still, it’s always fun to try something new! And it’s macaroni and cheese, can’t go wrong with mac and cheese!

Cheese Sauce

3 tablespoons butter
3 tablespoons flour
1/2 teaspoon salt
1/8 teaspoon ground white pepper
1 1/2 cups milk
1 cup grated extra sharp cheddar

Melt butter in saucepan and remove from heat. Stir in flour and seasonings. Gradually add milk, stirring until well mixed. Cook over low heat, stirring constantly, until thickened and smooth. Cook for 5 minutes longer, and then add cheese. Stir until smooth and well blended. Serve with pasta or vegetables.

Note: To make twice as much, double everything in recipe except only use 2 cups of milk instead of doubling the regular amount. Also, if you use a mild cheese like Monterey Jack instead of sharp cheddar this recipe makes a good base for cream casseroles.

Chocolate Fudge

I told you (or at least I think I told you) that we had a backlog of images/experiences to share – this is one of those posts – heh.

So, over the holidays I’m in the habit of making a nice big batch of this REALLY smooth fudge. You have to keep it refrigerated, but it’s SO worth it!

It’s really easy to make too – I highly recommend it. And actually, it’s a good thing you have to keep it in the fridge because the extra step makes it last a LITTLE longer… possibly. (The recipe is from my friend’s Mother!)

Sal’s Fabulously Smooth Fudge

1/2 pound butter
3 6 oz. bags Nestle Chocolate Chips
3 teaspoons vanilla
3 cups chopped walnuts
4 1/2 cups granulated sugar
1 can Carnation EVAPORATED milk

In large bowl, put butter, chocolate chips, vanilla, and walnuts. Set aside.

In large sauce pan, combine evaporated milk with granulated sugar. Bring to a rolling boil, and stirring continuously, boil for 6 minutes. Then, pour hot mixture into chocolate chip mixture, mixing until chocolate chips and butter are completely melted.

Put mix into buttered pans (at least one 9X13 and a 9X9 may be enough), so that fudge is one inch thick, and let sit in refrigerator to set. When totally set, cut into bite sized pieces and store in a tin or plastic container lined with wax paper, in the refrigerator.

Makes about 5 pounds. *** KEEP REFRIGERATED***

Bon Bon Cookies

We have a backlog of food events/photos to post about, so you’ll be seeing some that happened a while ago – I’m sure you’ll adjust.

For example, sometime during the holiday season I made Bon Bon Cookies – a Hershey kiss inside a ball, dipped in chocolate glaze. The dough makes EXACTLY two dozen if you use only enough dough to make sure the kiss is completely surrounded – no extra. It’s great exercise for your hands, needless to say.

And here’s a delicious photo:

I had some extra glaze so that’s why you see some textury-type swirls on top of the first layer of chocolate there.  You could probably make these for Valentine’s day – who wouldn’t love these – wrapped up with a red bow and all.

Bon Bon Cookies (kiss inside ball)

3/4 cup powdered sugar
1/2 cup margarine or butter softened
1 tblsp. vanilla
1 1/2 cups all purpose flour
1/8 tsp. salt
1 pkg. kisses

Heat oven to 350 degrees, mix powdered sugar, oleo, and vanilla. Work in flour and salt until dough holds together. For each cookie, shape dough by tablespoonful around kiss to form ball. Place one inch apart on UNGREASED cookie sheet. Bake until set, but not brown (12-15 min). Cool. Dip tops into glaze. Decorate with coconut, nuts, colored sugar… (2 dozen)

CHOCOLATE GLAZE: beat one cup powdered sugar, 2 tblspoons milk, 1 oz. melted unsweetened chocolate (cool) and 1 tsp. vanilla until smooth and of desired consistency.

Homemade Brownies

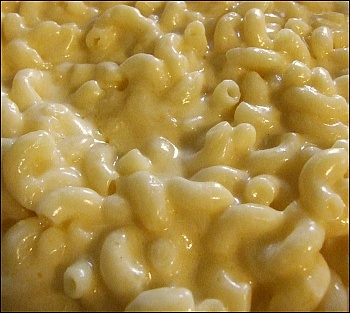
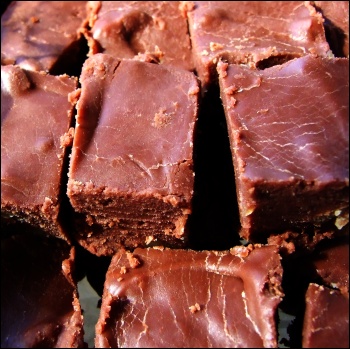
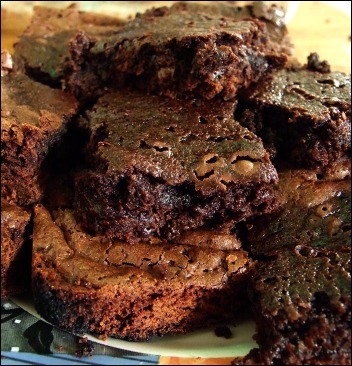
A number of months ago we bought some fair trade, unsweetened cocoa from Sweet Earth Chocolates

…and I just recently found an excellent ‘from scratch’ brownie recipe on the web (all over the web, actually, it seems to be a very popular recipe!) that just begged to make use of this cocoa stash of ours!

The recipe (below) is very simple and easy to put together. All of the ingredients dissolved into a wonderfully deep chocolate brown goo, to which I also added a cup of chocolate chips just to be excessive. The brownies turned out to be, hands down, the richest, most delicious brownies we’ve ever eaten!

I know the photo’s a little dark, but I realy wanted to convey the richness of these brownies! All but the center cut brownies had that nice flaky top, and the center cut ones were just a little moister, but didn’t collapse after being taken out of the oven. I don’t think I could ever go back to box mixes after having these.

Homemade Brownies

3/4 cup natural unsweetened cocoa powder, sifted
1/2 teaspoon baking soda
2/3 cup melted butter, divided
1/2 cup boiling water
2 cups granulated sugar
2 eggs
1-1/2 cups unbleached all-purpose flour
1 teaspoon vanilla
1/4 teaspoon salt
1 cup chopped walnuts or dark chocolate chips (optional)

Preparation

1. Preheat oven to 350° F. Lightly coat a 9 x 13 x 2-inch baking pan with cooking spray or vegetable oil.

2. In the mixing bowl, combine cocoa and baking soda. Add 1/3 cup melted butter and the boiling water and stir on low until the mixture thickens.

3. Stir in sugar, eggs, and remaining 1/3 cup melter butter. Mix until smooth.

4. Add the flour, vanilla, and salt, and mix completely. Stir in nuts or chips, if desired.

5. Pour into the prepared pan. Bake for 30 to 35 minutes or until brownies pull away from the sides of the pan, but watch them carefully after 30 minutes to make sure they don’t over bake. Cool completely in the pan. Cut into bars.

Oatmeal Scone with Strawberry Jam Recipe

When I woke up this morning I remembered the oatmeal scone recipe that we made a number of years ago. I hadn’t really thought about it in a long time, so it was kind of out of the blue that it came to me. I’m pretty sure that was my spirit guide telling me to get baking though, heh, and so I did.

This is probably one of the easiest recipes ever, by the way… just mix all the very basic ingredients together, spread it in a circle on a baking sheet and stick it in the oven. Highly recommended if you want to whip up something breakfasty or snackish but don’t want to spend a lot of time doing tricky/messy things in the kitchen.

Oatmeal Scones

1 1/2 cups all purpose flour
1 3/4 cups oats
1/4 cup granulated sugar
1 tablespoon baking powder
1/2 teaspoon salt
2/3 cup vegetable oil
1/3 cup milk
1 egg

Preheat oven to 425 degrees.

Mix flour, oats, sugar, baking powder, and salt in a large bowl until well blended. Add oil, milk, and egg and mix again until well blended.

Grease a cookie sheet. Place mixture in center of cookie sheet. Shape the mixture into a circle, approximately 3/4 inch in height. Bake 12-15 minutes. When done, cut into pie shaped wedges and serve with butter and jam, if desired.

Note: You can drizzle a little maple syrup on the top before baking for an interesting flavor addition.

Spinach Quiche

Last week we got some eggs on sale, 5 dozen eggs that is. That’s a lot of eggs for 2 people to eat. So far we’ve had scrambled, omelets and now one of my favorites: Quiche.

Quiche is one of those versatile foods you can add almost any ingredients too. Bacon, ham or even turkey or chicken can be used, Swiss, Cheddar, Monterey Jack or even Jarlsberg will due, but try to balance the saltiness of your meat to the strength of the cheese. Bland meats should use stronger cheeses and vice versa.

For veggies, I’ve used spinach, broccoli, mushrooms, peppers and carrots, depending what I had on hand. I prefer to have softer vegetables in my quiches, so I’ll usually steam them before adding them to the mix. If you like the crunchy texture though, feel free to add them in raw.

Below is the quiche we had tonight, a basic spinach quiche which came out absolutely perfect. As the weeks go on and we need to use those eggs, don’t be surprised if I post a more adventurous recipe.

Spinach Quiche

6 eggs (5 if eggs are extra large)
1/2 Cup Milk
4oz Spinach Leaves (or 2oz frozen)
1/2 Medium Onion
1/4 lb grated Medium Cheddar
3oz Ham, diced, or bacon crumbled

Pie Crust

1 cup Crisco
2 1/4 Cups Flour
1 tsp Salt
3/4 Cup Cold Water
(or used pre-made pie crust only need one of them for bottom of quiche.)

Makes 9 inch crust.

Begin pie crust by mixing Crisco, Flour and Salt together until it all looks crumbly, then slowly add water until you’ve got a nice malleable dough. Mold dough into a ball and roll out onto a lightly floured surface. Lay carefully into a pie plate and sculpt edges, the dough should be easy to work with. Set aside.

Next, finely chop onion and add with spinach into a vegetable steamer. (Note, if you like crunchy raw tasting onion you can leave it out of the steamer). Steam veggies for about 10 minutes, until spinach is fully cooked. Remove spinach from steamer and chop. If you’re using frozen spinach, just defrost. Can also saute onions in a pan instead.

In a large bowl, beat eggs and milk until smooth, then add cheese, ham/bacon, onion, and spinach. Mix everything thoroughly and then pour into the pie crust. Place in oven and bake at 400 degrees F for 30-45 minutes. Quiche is done when toothpick comes out of the center dry. Will probably settle a little as it cools.

Meatball Heroes

For the first time in several weeks, we finally had a break in the 100+ degree weather out here. Cooking has been out of the question, we’ve been living on sandwiches, salads, hotdogs, and hard boiled eggs.

We decided to celebrate with Meatball Heroes, a delicacy that can be found in any Brooklyn Pizza Parlor, but remains a complete mystery to the denziens of California. So for those of you who have never experienced this bit of meaty, cheesy, deliciousness.

You’ll need:

1 loaf Italian/French bread (good and crusty)
1/2 lb mozzeralla cheese shredded
16oz Marinara sauce
Lots of Meatballs

Basic Italian Meatballs Recipe

2lbs Ground Beef
2 Eggs
1 tsp minced garlic
1 cup breadcrumbs
2 tsp Oregano
1/2 tsp Salt
1/2 tsp Black Pepper
1 tbsp Onion Powder
1 tsp Thyme

Preheat oven to 350F (You can fry meatballs as well, but I find that searing, which is great for hamburgers, makes meatballs too bitter.)
Place the meat in a mixing bowl and add the eggs and spices, mix thoroughly and then roll into balls about 1 inch in diameter.

Place the meatballs on a cookie sheet and bake for 45 min to 1hr, until they are no longer pink in the center. This is the end of the meatballs recipe, now, back to the ‘Heroes’ part!

Next cut the bread to whatever size you can eat without exploding. Slice the bread most of the way through but keep the bottom edge of the crust together. Cut the meatballs in half and layer them on the sandwich. Next, add sauce, slathering evenly over the meatballs. Sprinkle (ok dump) the mozzarella cheese on top and tightly wrap the entire sandwich in aluminum foil. If you feel like you’re wrestling an alligator then you’re doing it right. 🙂

Bake the sandwiches at 400F for 30 minutes. Then remove carefully, the cheese should be completely melted and the outer edge of the crust should be hot and crispy. (Note: it’s ok to lick cheese off the foil) and dive in! If you have fresh Parmesian or Romano they’ll make an excellent addition as well.

Another good option is to use Italian Sausage. Slice the sausages into coins after cooking them and layer them on the sandwich like you did with the meatballs.

This recipe should make 3 large heroes.